
Setup a New MyHub TV Box
If you’ve made it to this help page, it is because you are now in receipt of a new MyHub TV Box. These short instructions will detail in a few minutes how you can get setup and using ResHub.
First, lets unpack the box. The following picture shows the full contents for your setup.
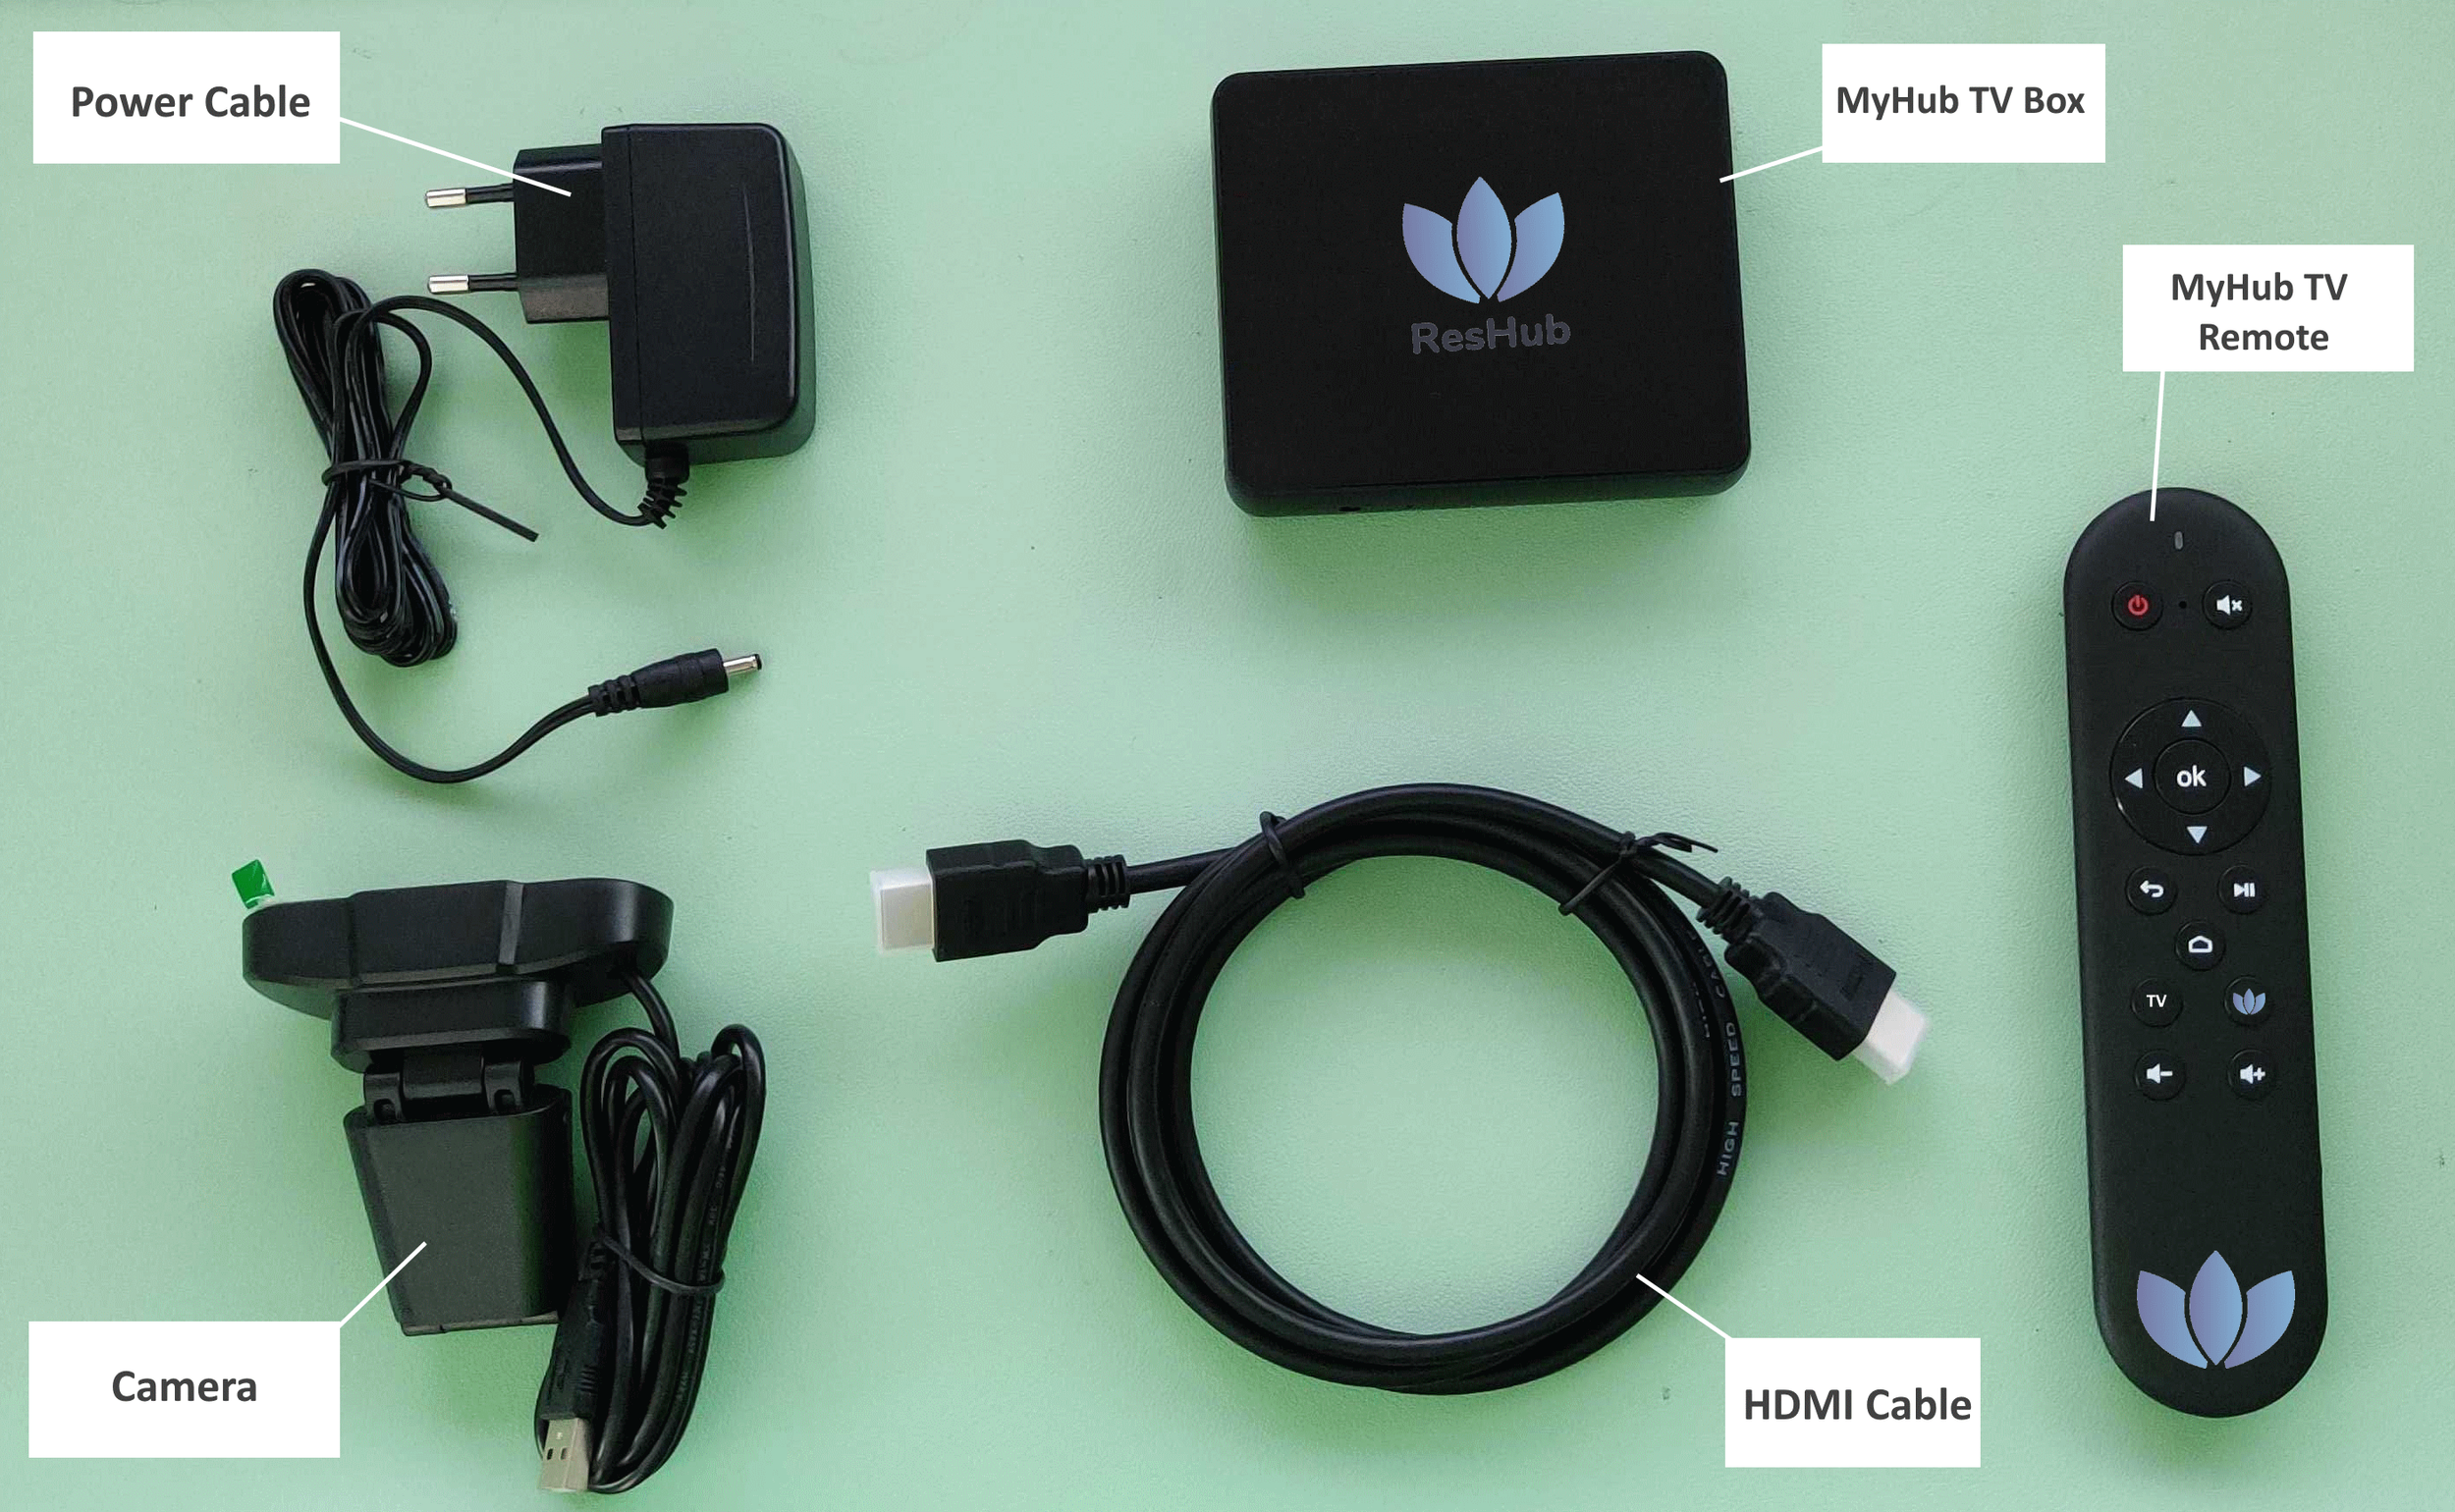
TV Box Contents
MyHub TV Box Custom Android TV box contains ResHub , connects to your TV by HDMI.
Power Cable Region specific plug.
MyHub TV Remote Remote control for TV Box.
HDMI Cable Connects TV Box to TV.
Camera Enables video calls and interactive events.
Prerequisites
WiFi or Ethernet Cable
A TV with a spare HDMI port
TV Box Modes
Staff Mode
In staff mode, the device is not actually assigned to any individual resident. This mode is usually reserved for TV Boxes placed in common areas such as cinema rooms.
Resident Configuration
In resident mode, the device is usually installed behind a TV in the residents room, turning their TV into an interactive Hub where residents can connect with family, other residents, staff, events and services throughout the community.
Connecting the Box
Once you have read the above, you can proceed to connect the power cable to the back of the TV Box and plug it in.
Connect the HDMI cable from the HDMI OUT port on the TV Box into a free HDMI Port on your TV.
Switch the TV source to the HDMI port you connected the box to. Many modern TV’s will do this automatically.
(If using WiFi) One the TV Box launches you will be presented with a login screen and an option to connect to WiFi if the device is not already connected. Tap the WiFi button and connect to your local WiFi.
Login to MyHub using your Staff Login that you usually use for StaffHub. If you are unsure, contact support@getreshub.com.
Once you are logged in you can now decide if you want a Staff Mode or a Resident Mode. Refer to your staff training for help setting this up.